Creating and Editing Configuration Fields
This topic describes how to use the Config custom resource manifest file to add and edit fields in the Replicated admin console configuration screen. For more information about the configuration screen, see About the Configuration Screen.
Overview of the Config Custom Resource
To include a configuration screen in the Replicated admin console for your application, you add a Config custom resource manifest file to the release in the Replicated vendor portal.
You define the fields that appear on the configuration screen as an array of groups and items in the Config custom resource manifest:
groups: A set ofitems. Each group must have aname,title,description, anditems. For example, you can create a group of several user input fields that are all related to configuring an SMTP mail server.items: An array of user input fields. Each array underitemsmust have aname,title, andtype. You can also include several optional properties. For example, in a group for configuring a SMTP mail server, you can have user input fields underitemsfor the SMTP hostname, port, username, and password.There are several types of
itemssupported in the Config manifest that allow you to collect different types of user inputs. For example, you can use thepasswordinput type to create a text field on the configuration screen that hides user input.
For more information about the syntax of the Config custom resource manifest, see Config in the Custom Resources section.
Add Fields to the Configuration Screen
Applications can include a configuration screen in the Replicated admin console to collect required or optional values from your users that are used to run your application.
Add and edit fields on the admin console configuration screen by editing the Config custom resource manifest file.
After you create fields in the Config manifest file, you then map the fields to other manifest files in your application to apply the user-supplied values. If you use a Helm chart for your application, you map the fields that you add to the values.yaml file. For more information, see Next Steps below.
To add fields to the admin console configuration screen:
In the vendor portal, click Releases. Then, either click Create release to create a new release, or click Edit YAML to edit an existing release.
Create or open the Config custom resource manifest file in the desired release. A Config custom resource manifest file has
kind: Config.In the Config custom resource manifest file, define custom user-input fields in an array of
groupsanditems.Example:
apiVersion: kots.io/v1beta1
kind: Config
metadata:
  name: my-application
spec:
  groups:
    - name: smtp_settings
      title: SMTP Settings
      description: Configure SMTP Settings
      items:
        - name: enable_smtp
          title: Enable SMTP
          help_text: Enable SMTP
          type: bool
          default: "0"
        - name: smtp_host
          title: SMTP Hostname
          help_text: Set SMTP Hostname
          type: text
        - name: smtp_port
          title: SMTP Port
          help_text: Set SMTP Port
          type: text
        - name: smtp_user
          title: SMTP User
          help_text: Set SMTP User
          type: text
        - name: smtp_password
          title: SMTP Password
          type: password
          default: 'password'
The example above includes a single group with the name
smtp_settings.The
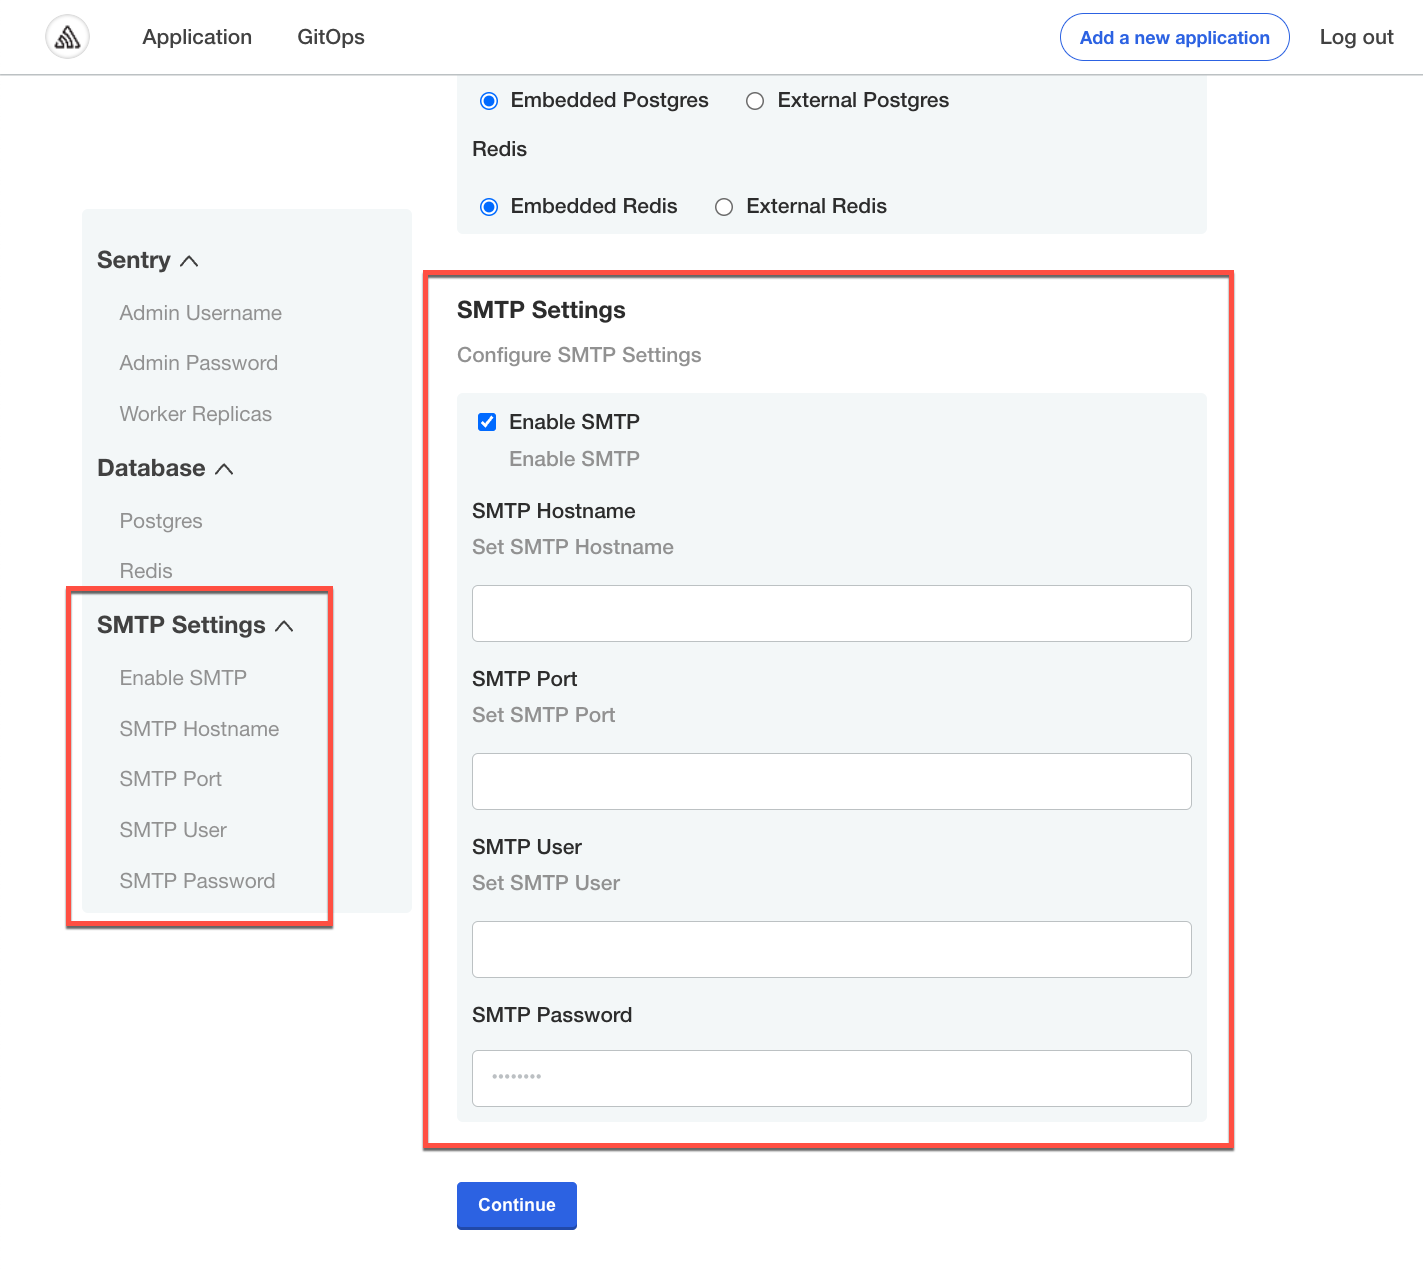
itemsarray for thesmtp_settingsgroup includes the following user-input fields:enable_smtp,smtp_host,smtp_port,smtp_user, andsmtp_password.The following screenshot shows how the SMTP Settings group from the example YAML above displays in the admin console configuration screen during application installation:

(Optional) Add default values for the fields. You can add default values using one of the following properties:
With the
defaultproperty: When you include thedefaultkey, the Replicated app manager uses this value when rendering the manifest files for your application. The value then displays as a placeholder on the configuration screen in the admin console for your users. The app manager only uses the default value if the user does not provide a different value.noteIf you change the
defaultvalue in a later release of your application, installed instances of your application receive the updated value only if your users did not change the default from what it was when they initially installed the application.If a user did change a field from its default, the admin console does not overwrite the value they provided.
With the
valueproperty: When you include thevaluekey, the app manager does not overwrite this value during an application update. The value that you provide for thevaluekey is visually indistinguishable from other values that your user provides on the admin console configuration screen. The app manager treats user-supplied values and the value that you provide for thevaluekey as the same.
(Optional) Mark fields as required by including
required: true. When there are required fields, the user is prevented from proceeding with the installation until they provide a valid value for required fields.Example:
- name: smtp_password
  title: SMTP Password
  type: password
  required: true
Save and promote the release to a development environment to test your changes.
Next Steps
After you add user input fields to the configuration screen, you use template functions to map the user-supplied values to manifest files in your release. If you use a Helm chart for your application in Replicated, you map the values to the Helm chart values.yaml file using the Replicated HelmChart custom resource.
For more information, see Mapping User-Supplied Values.