About Releases
This topic describes concepts about creating and promoting releases, editing release properties, and information about the Releases page in the Replicated vendor portal.
Overview of Releases
You can use the Replicated vendor portal to create and release versions of your application to various release channels. The vendor portal hosts a built-in YAML editor and linter to help you write and validate manifest files.
Alternatively, you can use the replicated CLI and API to automate releases. For more information about using the CLI, see Installing the replicated CLI. For information about the API, see Using the Vendor API v3.
Application files can be either Helm charts or Kubernetes manifest files, which can include standard manifests such as Deployment and Service resources.
Custom Resources
Replicated includes several custom resources that you can add to your releases, which are packaged as part of the application but not deployed to the cluster. Custom resources are consumed by the app manager, the admin console, or by other kubectl plugins to control the application experience. For more information, see About Custom Resources.
Release Promotion
After you save a release, you can promote it to any of your release channels. While you are developing and testing an application release, Replicated recommends that you promote to a channel that does not have any customers assigned, such as the default Unstable channel. When you are ready to share your application with customers, you can then promote to a channel where customers are assigned, such as the default Beta or Stable channels. For more information about channels, see About Release Channels.
Every customer license file that you create in the vendor portal is assigned to a channel. Each time you promote a new release to a channel, customers assigned to that channel can update their installed application instance to the new release version.
Semantic Versioning
Semantic versioning is available with the Replicated app manager v1.58.0 and later. Note the following:
For applications created in the vendor portal on or after February 23, 2022, semantic versioning is enabled by default on the Stable and Beta channels. Semantic versioning is disabled on the Unstable channel by default.
For existing applications created before February 23, 2022, semantic versioning is disabled by default on all channels.
When you enable semantic versioning on a channel, the version label for a release promoted to that channel is verified to ensure that it is a valid semantic version. For more information about valid semantic versions, see Semantic Versioning 2.0.0.
If you enable semantic versioning for a channel and then promote releases to it, Replicated recommends that you do not later disable semantic versioning for that channel.
Release Properties
You cannot edit the YAML files in a release after the release is promoted to a channel. However, each release has properties, such as the release notes, the version label, and the required status, that you can edit from the channel Release History page in the vendor portal. For more information, see About the Channels Page in About Release Channels.
Release Sequencing
By default, Replicated uses release sequence numbers to organize and order releases, and uses instance sequence numbers in an instance's internal version history.
Release Sequences
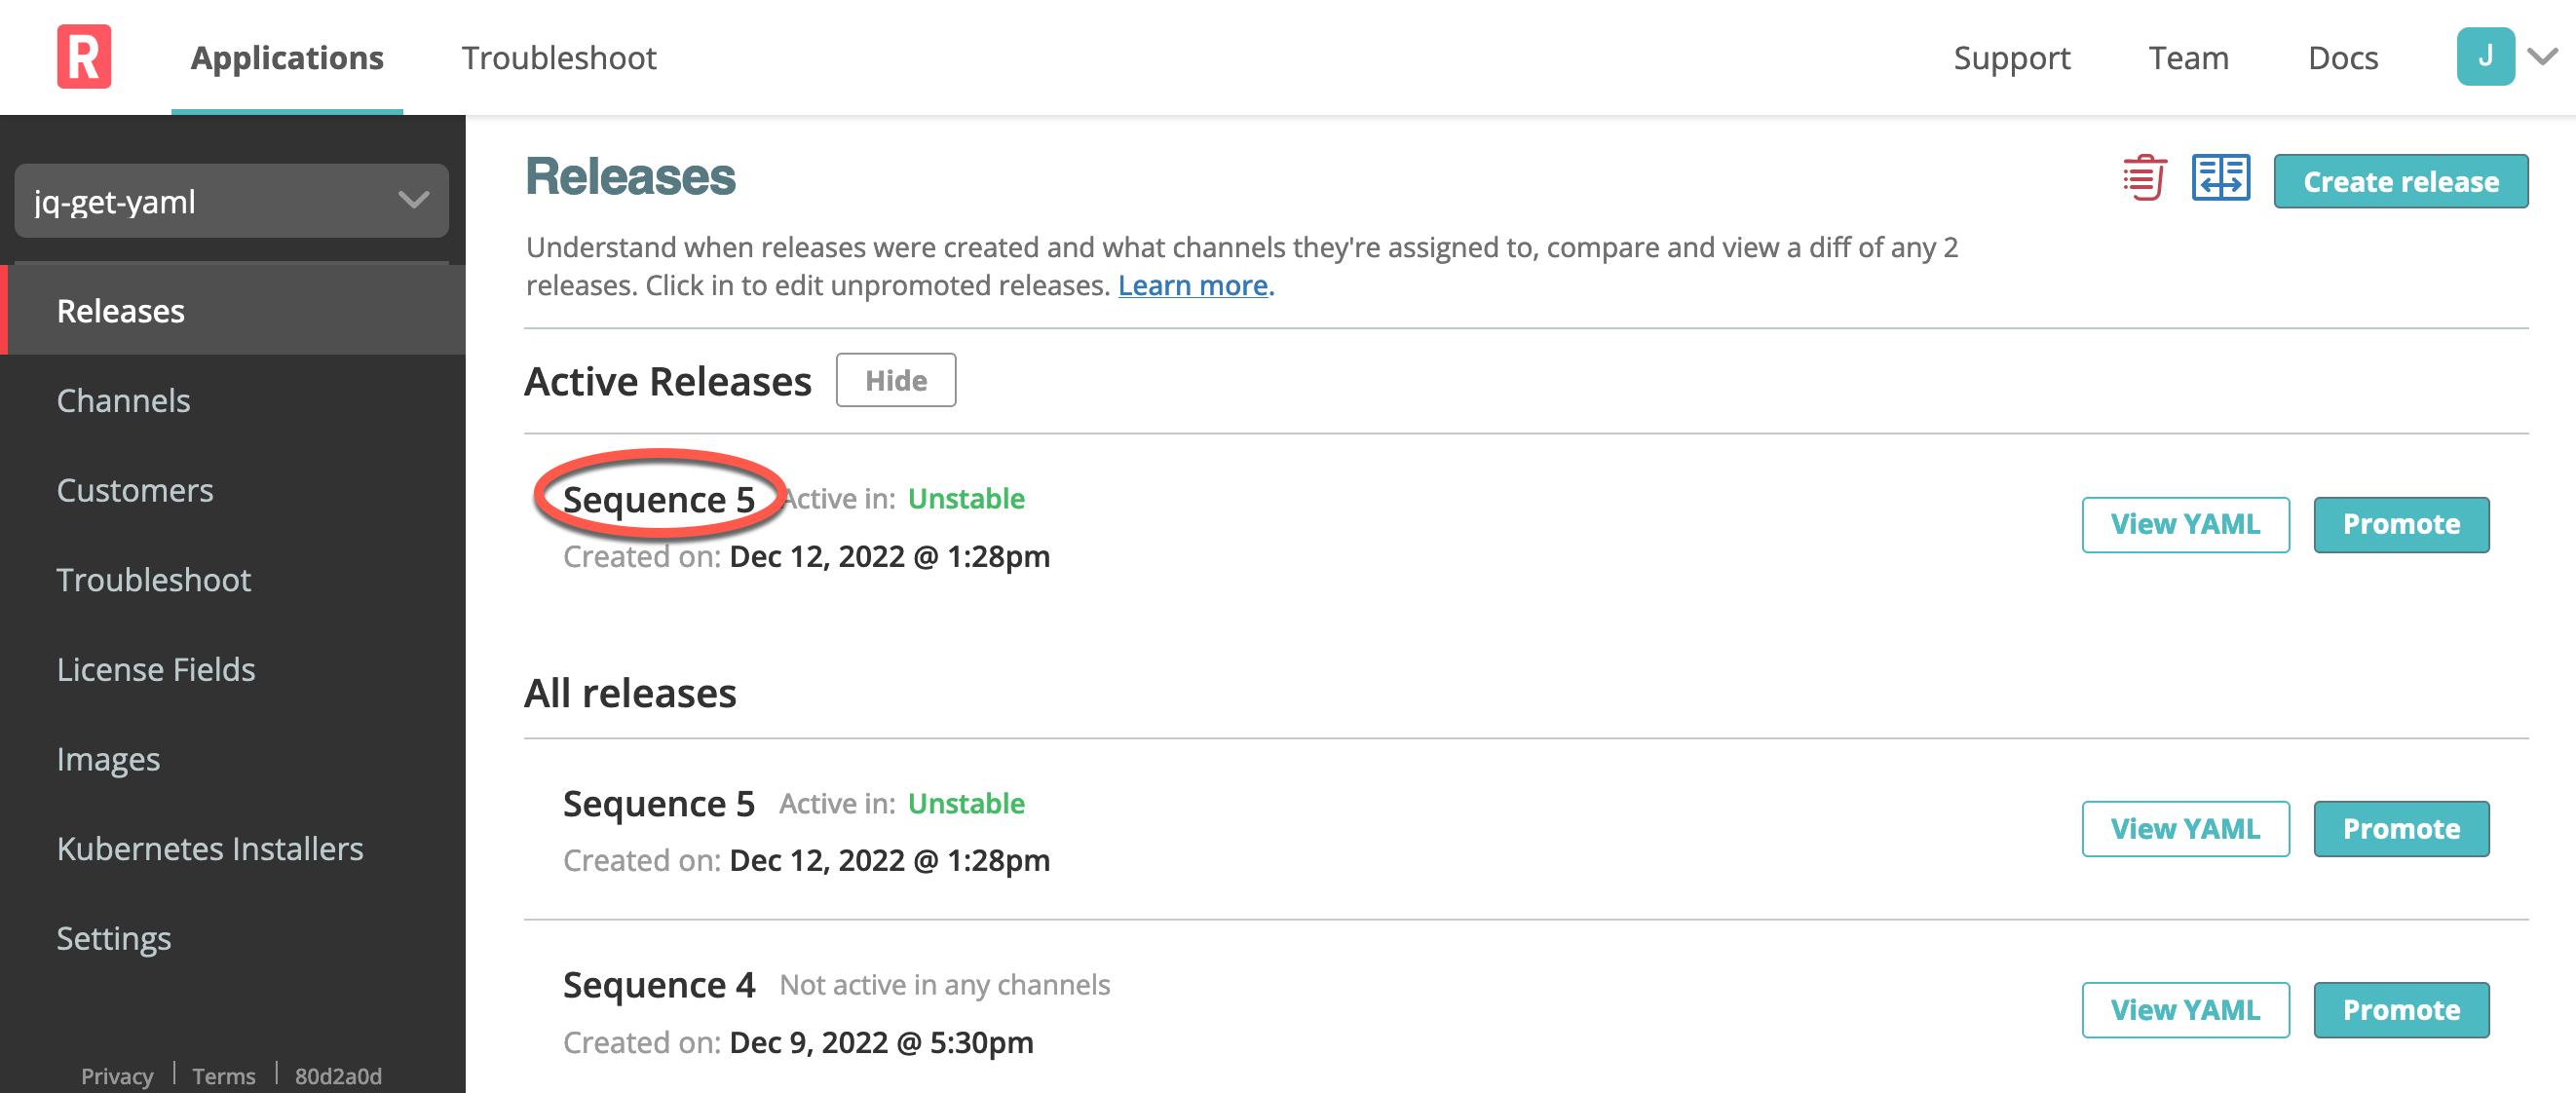
In the vendor portal, each release is automatically assigned a unique, monotonically-increasing sequence number. You can use this number as a fallback to identify a promoted or draft release, if you do not set the Version label field during promotion. For more information, see Creating Releases with Standard Manifest Files or Creating Releases with Helm Charts.
The following graphic shows release sequence numbers in the vendor portal:

View a larger version of this image
Instance Sequences
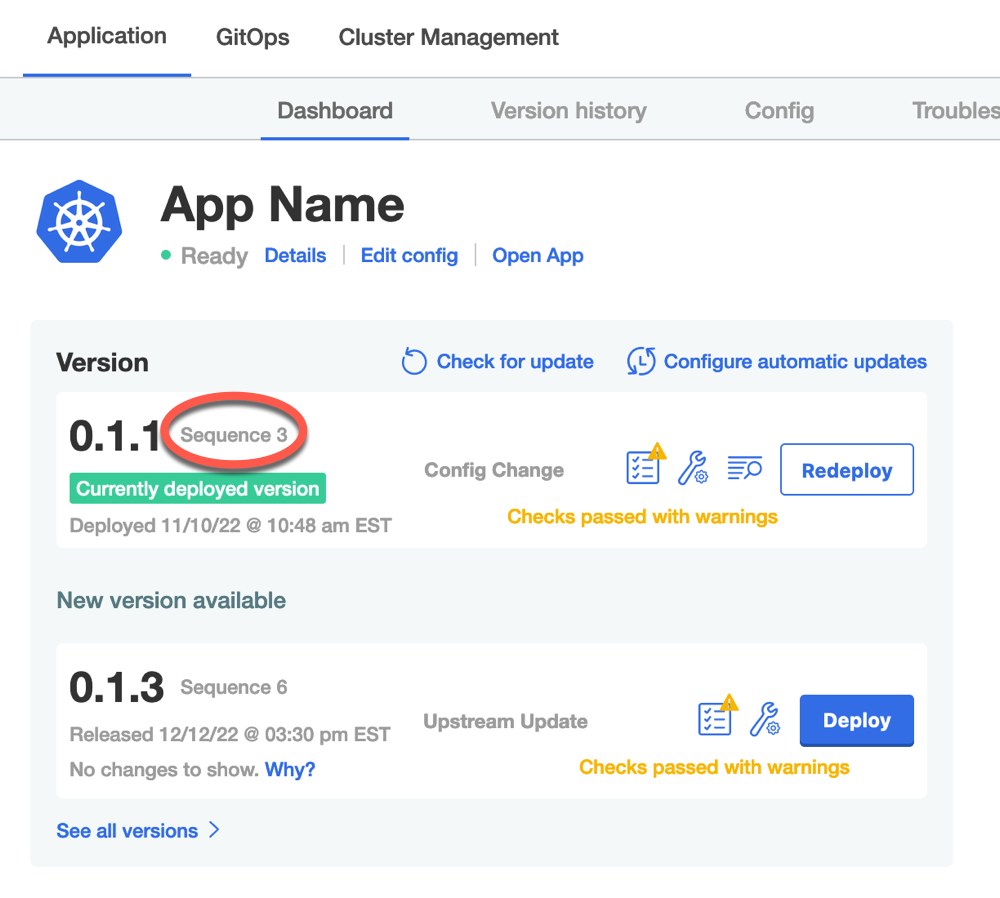
When an app manager instance checks for an application update, the vendor portal returns a release identifier (a sequence number or a version label) to the instance. The admin console then assigns the release a unique instance sequence number. This instance sequence is separate from a release sequence in the vendor portal. The instance sequence in the admin console starts at 0 and increments for each release identifier that is returned when the app manager checks for an update.
A single release sequence, such as 181, can have multiple instance sequences in the deployed instances, depending on when those instances came online and how many other releases were seen before release sequence 181.
Note that instance sequences are only tracked by app manager instances, and the vendor portal has no knowledge of these numbers.
The following graphic shows instance sequence numbers on the Replicated admin console dashboard:

Semantic Versioning Sequence
For channels with semantic versioning enabled, the admin console sequences instance releases by their semantic versions instead of their promotion dates.
If releases without a valid semantic version are already promoted to a channel, the admin console sorts the releases that do have semantic versions starting with the earliest version and proceeding to the latest. The releases with non-semantic versioning stay in the order of their promotion dates. For example, assume that you promote these releases in the following order to a channel:
- 1.0.0
- abc
- 0.1.0
- xyz
- 2.0.0
Then, you enable semantic versioning on that channel. The admin console sequences the version history for the channel as follows:
- 0.1.0
- 1.0.0
- abc
- xyz
- 2.0.0
For information about how enterprise application users check for application updates in the admin console, see Checking for Updates.
About the Draft Release Page
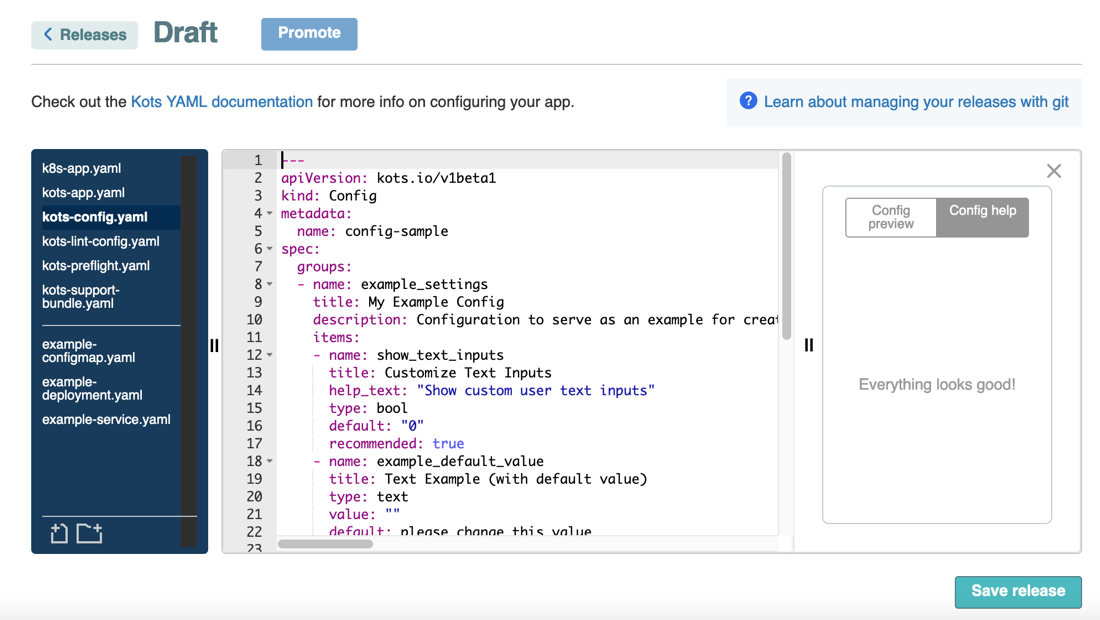
You click Releases > Create Release in the vendor portal to open the Draft page. This page provides a YAML editor to add, edit, and delete your application files and Replicated custom resources.
The following shows an example of the Draft page in the vendor portal:

You can do the following tasks on the Draft page:
In the file directory, manage the file directory structure. Replicated custom resource files are grouped together above the white line of the file directory. Application files are grouped together underneath the white line in the file directory.
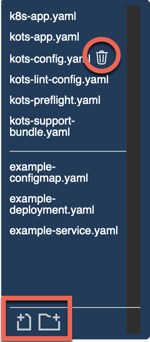
Delete files using the trash icon that displays when you hover over a file. Create a new file or folder using the corresponding icons at the bottom of the file directory pane. You can also drag and drop files in and out of the folders.

Edit the YAML files by selecting a file in the directory and making changes in the YAML editor.
In the Help or Config help pane, view the linter for any errors. If there are no errors, you get an Everything looks good! message. If an error displays, you can click the Learn how to configure link. For more information, see Using the Linter in Linter Rules.
Select the Config custom resource to preview how your application's Config page will look to your customers. The Config preview pane only appears when you select that file. For more information, see About the Configuration Screen.
Select the Application custom resource to preview how your application icon will look in the Replicated admin console. The Application icon preview only appears when you select that file. For more information, see Customizing the Application Icon.